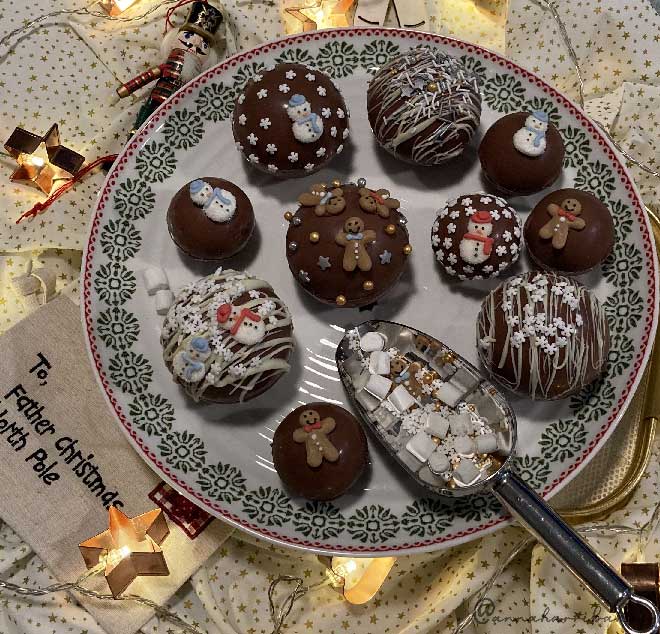
Hot Chocolate Baubles
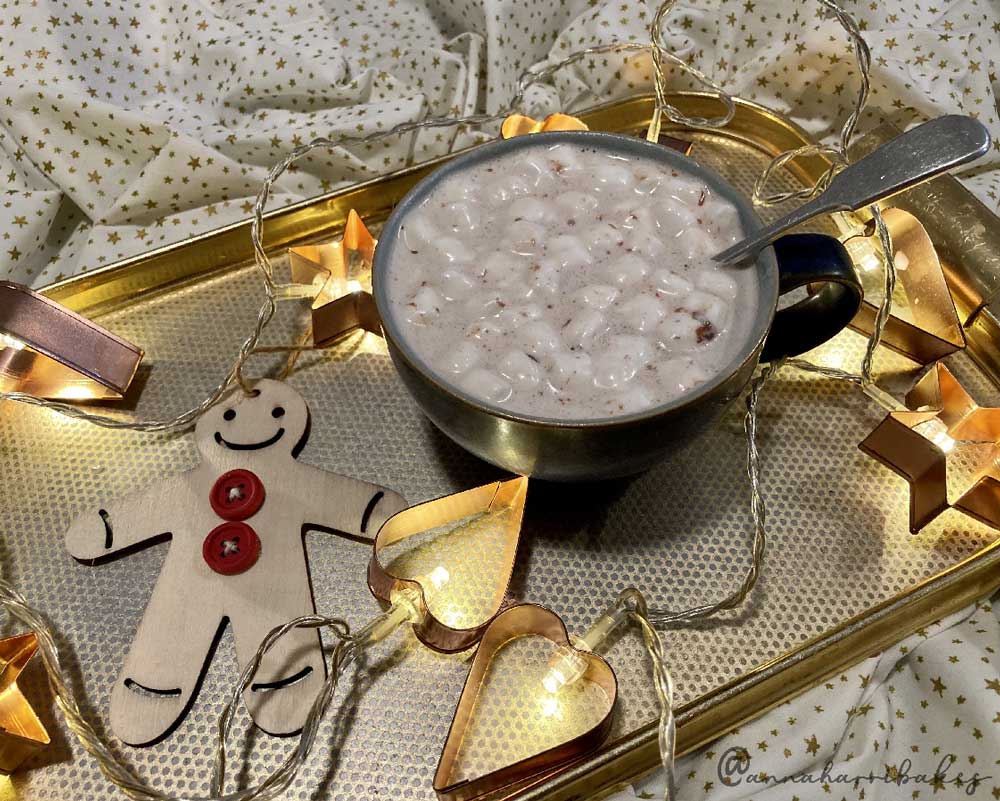
Otherwise known as hot chocolate bombs, this is my festive take on these popular treats. Great for making with kids, and great for gift-giving! Each bauble contains all the ingredients needed for a perfect hot chocolate. Simply place into the bottom of a mug, and pour over hot milk until the outer casing dissolves and the bauble 'explodes'. Stir thoroughly.
Makes about 15 baubles (mix of small and large).
Ingredients
Equipment
Method
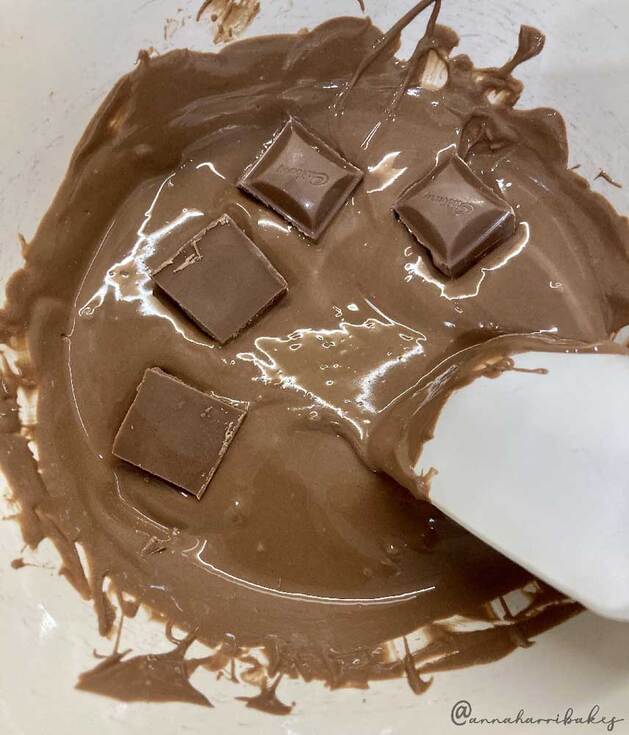
1. Melt the chocolate in a bain-marie or in a microwave (if doing this in a microwave, keep a close eye on it – keep stopping and stirring). As soon as it’s all melted, remove it from the heat (avoid over-heating milk chocolate).
2. Leave the chocolate to cool slightly, so that the chocolate thickens a little (too hot and it will be too runny and too difficult to work with)
Otherwise known as hot chocolate bombs, this is my festive take on these popular treats. Great for making with kids, and great for gift-giving! Each bauble contains all the ingredients needed for a perfect hot chocolate. Simply place into the bottom of a mug, and pour over hot milk until the outer casing dissolves and the bauble 'explodes'. Stir thoroughly.
Makes about 15 baubles (mix of small and large).
Ingredients
- 2 x 360g bar Cadbury’s Dairy Milk (if you want to experiment with different coloured baubles, use white chocolate and a small amount of food colouring to colour the chocolate. Build the colour up gradually – it won’t take much)
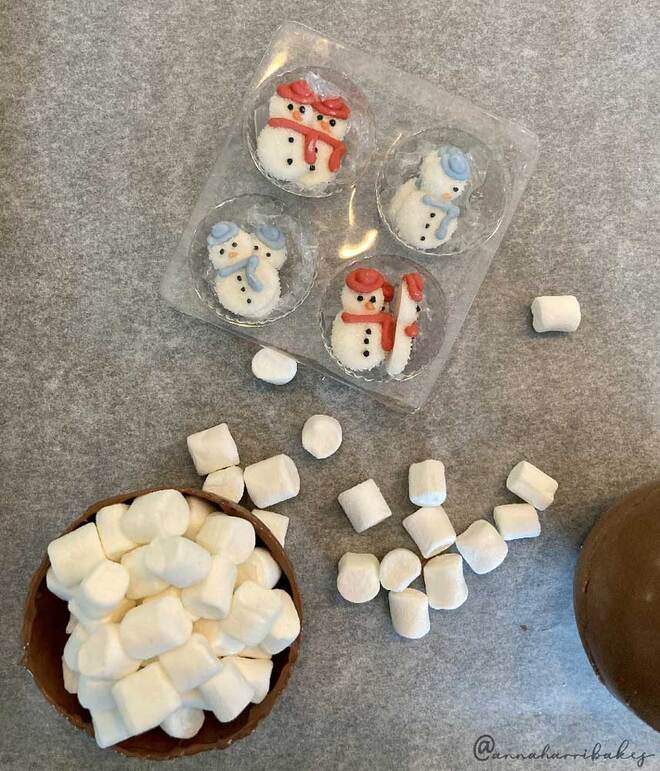
- 150g mini marshmallows (ASDA, £1)
- White chocolate, for decoration (I used Cadbury’s)
- A range of edible decorations (I used Dr Oetker Glamour and Sparkle sprinkles; snowmen and gingerbread men from Culpitt; white snowflakes from AKGifts, via Amazon)
Equipment
- Semi-circle silicone moulds (food grade). I used two sizes: 6 cavities (11.0" x 6.5", 2.7" x 1.2"), 8 cavities (11.2" x 6.7", 2.0" x 0.8"). These are available together, in a single pack, on Amazon
- Gift bags (optional). I used Lakeland’s The Snowman treat bags.
- Pastry brush
- Baking tray and parchment, for assembly
- Food grade gloves
Method
1. Melt the chocolate in a bain-marie or in a microwave (if doing this in a microwave, keep a close eye on it – keep stopping and stirring). As soon as it’s all melted, remove it from the heat (avoid over-heating milk chocolate).
2. Leave the chocolate to cool slightly, so that the chocolate thickens a little (too hot and it will be too runny and too difficult to work with)
3. Place the semi-circle moulds on a tray (to make it easy to move them to the fridge later), and begin filling them. Be generous: for the baubles to be sturdy, you need quite a thick layer of chocolate. Mine were too thin and flimsy to start with. As a guide, I ended up using 2½ generous teaspoons per half mould (for the largest size of mould).
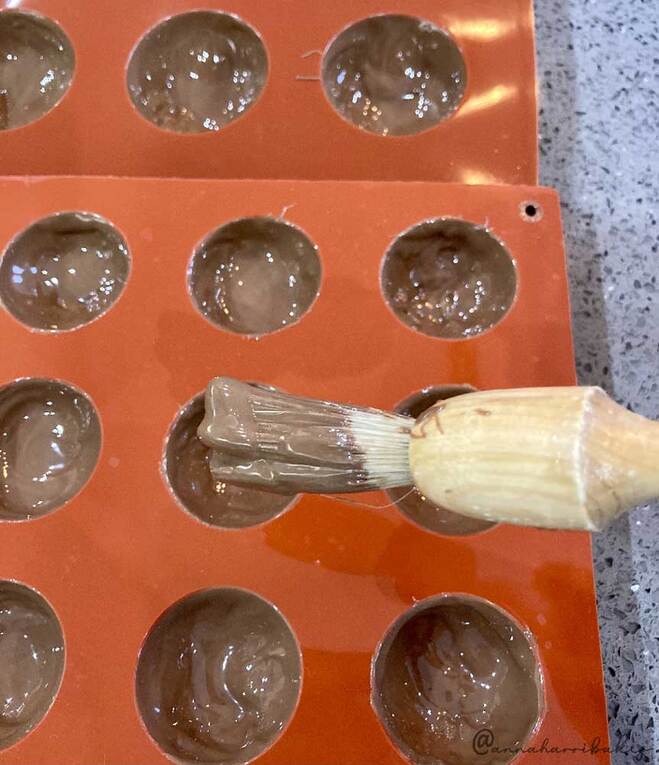
4. Leave to harden in the fridge for about 25 minutes. About 15 minutes in to the chill, remove the half spheres and use a small spoon or piping bag to run some more chocolate around the inside rim of each, to reinforce. Again, use chocolate that has cooled but not set (hot or very warm chocolate will be too runny). Then, turn the chocolate spheres out of the mould and repeat the process until you’ve used nearly all the chocolate. Retain a ramekin of melted chocolate for assembly. Keep all half spheres in the fridge until required for assembly. When handling the spheres, it’s best to wear gloves and best to act as quickly as possible so as not to melt them.
5. To assemble, take a baking tray with parchment and drizzle a small amount of chocolate on the parchment to create a mini disc. This will be the standing platform for your bauble, but you can forgo this step if you want. Then place one half sphere in the centre of the disc (convex side down). Leave to set.
6. Taking the leftover chocolate (cooled, not hot), use a small spoon or piping bag to run a small amount of chocolate around the rim of the half sphere. You could, instead, melt the rim by running it over a warm plate set above a basin of hot water (you’d need to do this before attaching the half sphere to the chocolate disc/parchment).
7. Working fairly quickly, fill the half sphere with marshmallows (pile them as high as possible) and then attach the top half sphere. Still wearing gloves, run your finger along the seam to join the two half spheres together. Some recipes suggest you could fill the half sphere with other edibles – extra chocolate would work (though I didn’t find it was necessary as I used a thick shell), but I tried sugar sprinkles etc. and I can confirm there’s no point – they just disappear straight away. That’s why it’s best to reserve these for the outside decorations.
8. Return the spheres to the fridge to set, while you prepare the decorations.
9. When you’re ready to decorate, take the spheres from the fridge and use cool (not hot) melted chocolate to attach your decorations. Simply melting white chocolate, letting it cool a little, and then drizzling it over each sphere using a fork is highly effective. You could experiment with designs e.g. a Christmas pudding bauble...
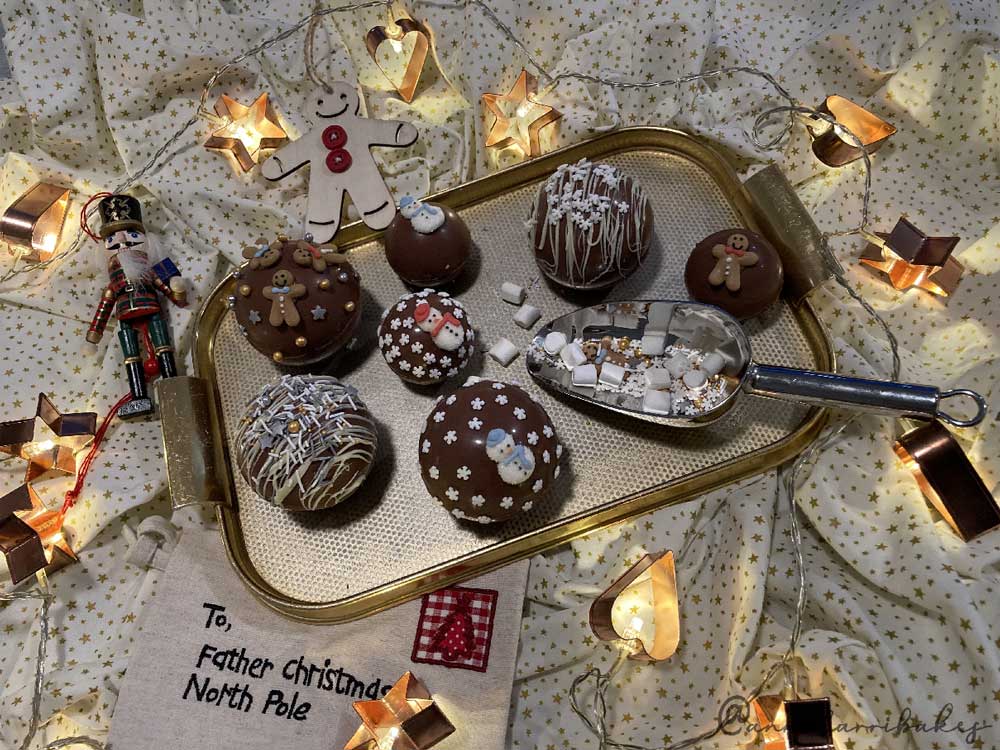
10. Return to the fridge to harden, and then transfer to gift bags. To use, place one bauble in the centre of a wide mug and pour over hot milk. Watch as the chocolate exterior melts and the marshmallows explode and rise to the surface!