Chocolate Porter Gâteau
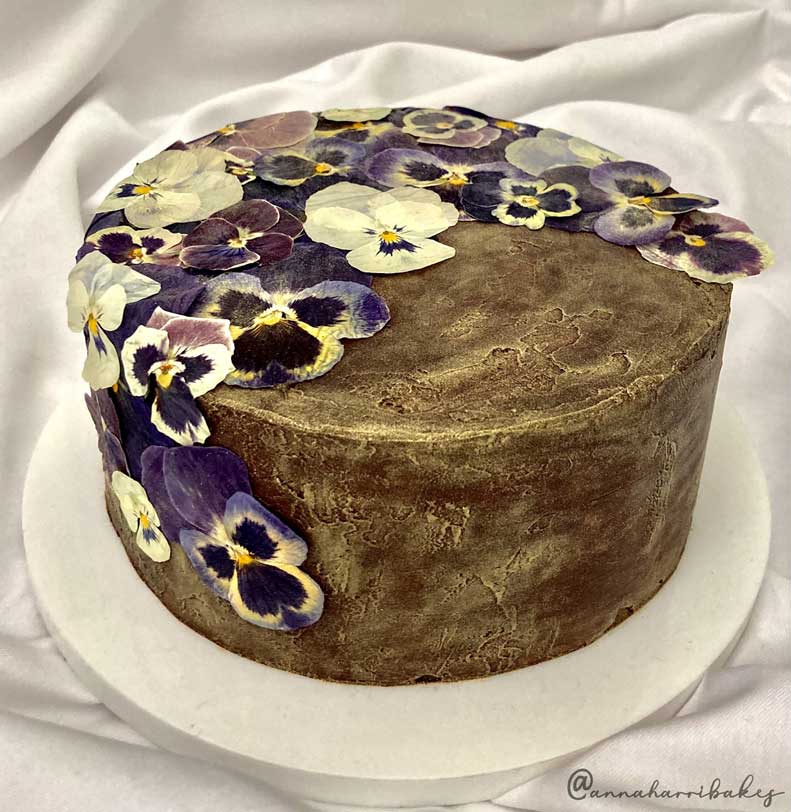
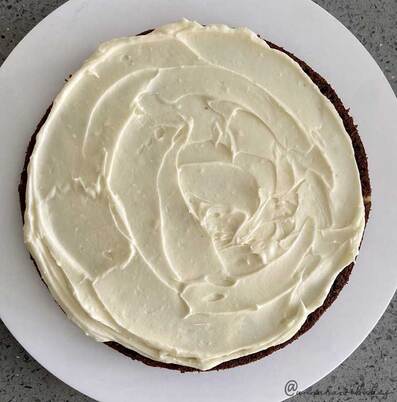
A few years ago I discovered a wonderful cupcake recipe in the BBC Good Food magazine. I've adapted it here to make an indulgent, stacked gâteau with a ganache frosting, which makes a perfect base for decoration of your choice. The use of porter in the sponge really brings out the chocolate flavour. The addition of chocolate chips creates not only more indulgence but also a contrasting texture to the creaminess of the filling, while the sharpness of the cream cheese cuts through the sweetness of the chocolate and sugar. Make it for a birthday celebration - it's incredibly delicious and looks spectacular. The design pictured here was for my mum's birthday: I used home-grown pansies from my parents' garden, and dusted them in a subtle edible gold, which I also brushed over the hardened ganache to emphasise the contours of its rustic texture.
Ingredients
For the sponge
Method
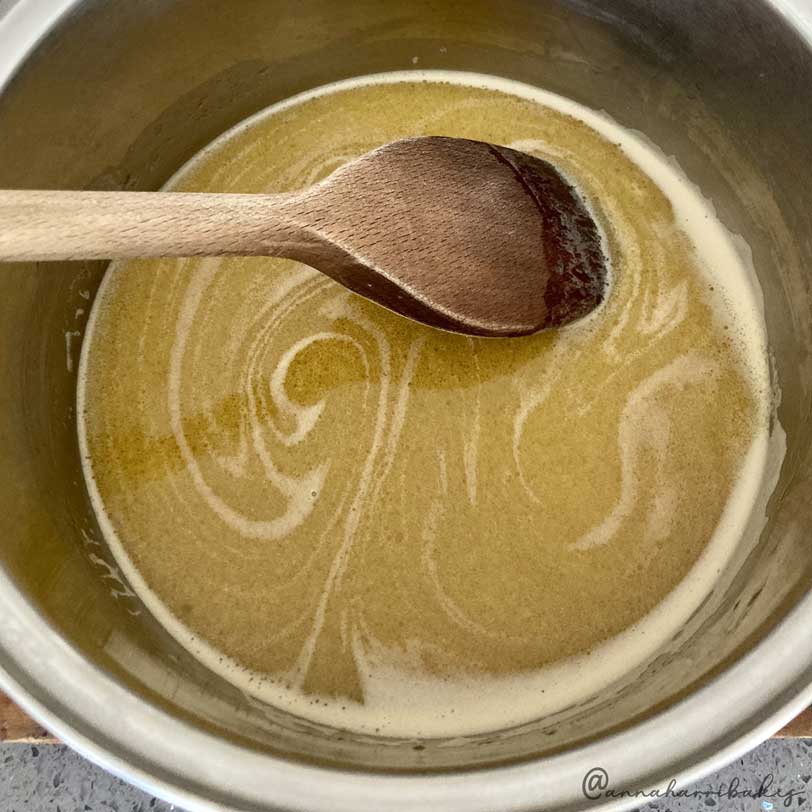
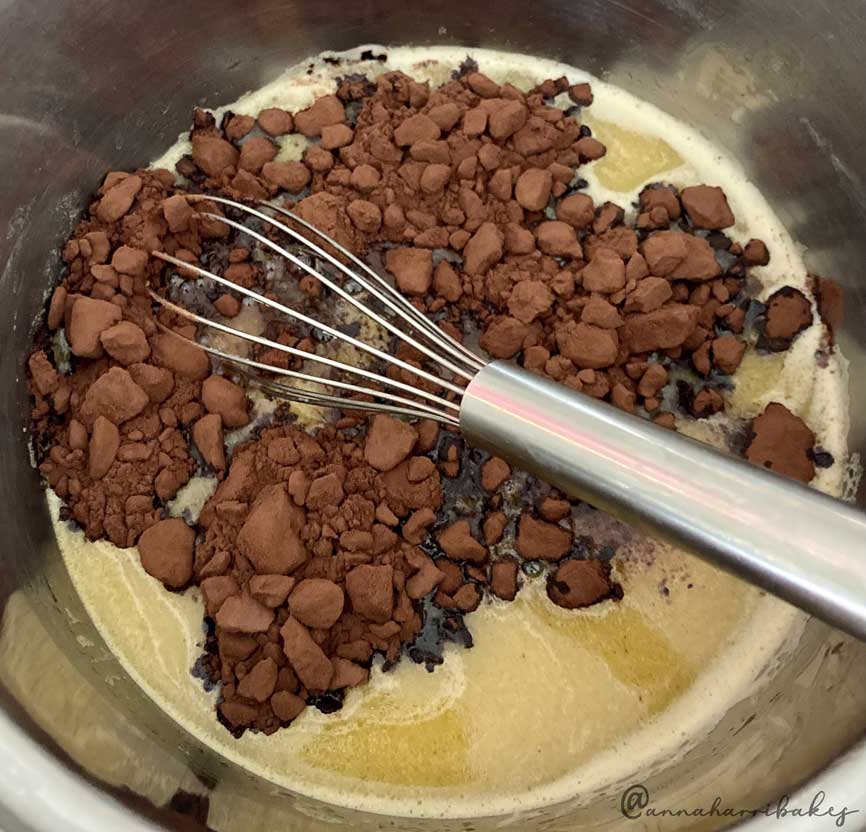
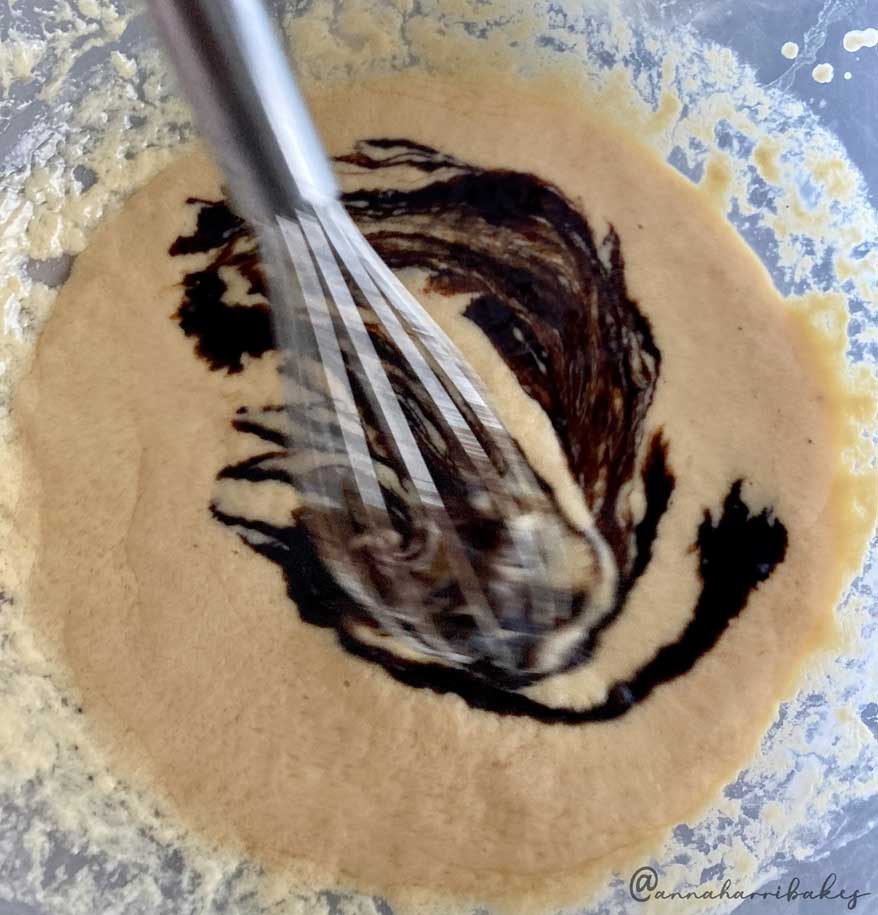
1. Preheat the oven to 160°C (fan) or 180°C (non fan). In a saucepan over a low heat, heat the butter and porter together until the butter has melted. Remove from the heat and whisk in the cocoa and sugar.
A few years ago I discovered a wonderful cupcake recipe in the BBC Good Food magazine. I've adapted it here to make an indulgent, stacked gâteau with a ganache frosting, which makes a perfect base for decoration of your choice. The use of porter in the sponge really brings out the chocolate flavour. The addition of chocolate chips creates not only more indulgence but also a contrasting texture to the creaminess of the filling, while the sharpness of the cream cheese cuts through the sweetness of the chocolate and sugar. Make it for a birthday celebration - it's incredibly delicious and looks spectacular. The design pictured here was for my mum's birthday: I used home-grown pansies from my parents' garden, and dusted them in a subtle edible gold, which I also brushed over the hardened ganache to emphasise the contours of its rustic texture.
Ingredients
For the sponge
- 125g unsalted butter
- 125ml porter
- 60g cocoa powder
- 225g light brown soft sugar
- 2 eggs
- 75g natural yoghurt (avoid low fat)
- 2 tsp vanilla extract
- 150g self-raising flour
- 1 teaspoon bicarbonate of soda
- 50g milk chocolate chips
- 50g white chocolate chips
- 125g unsalted butter
- 250g icing sugar
- 1 teaspoon vanilla extract
- 200g full-fat cream cheese
- 200ml double cream
- 400g good quality dark chocolate (70% cocoa solids) – choose your favourite
- Two Victoria sandwich tins, greased and lined with baking parchment
Method
1. Preheat the oven to 160°C (fan) or 180°C (non fan). In a saucepan over a low heat, heat the butter and porter together until the butter has melted. Remove from the heat and whisk in the cocoa and sugar.
|
|
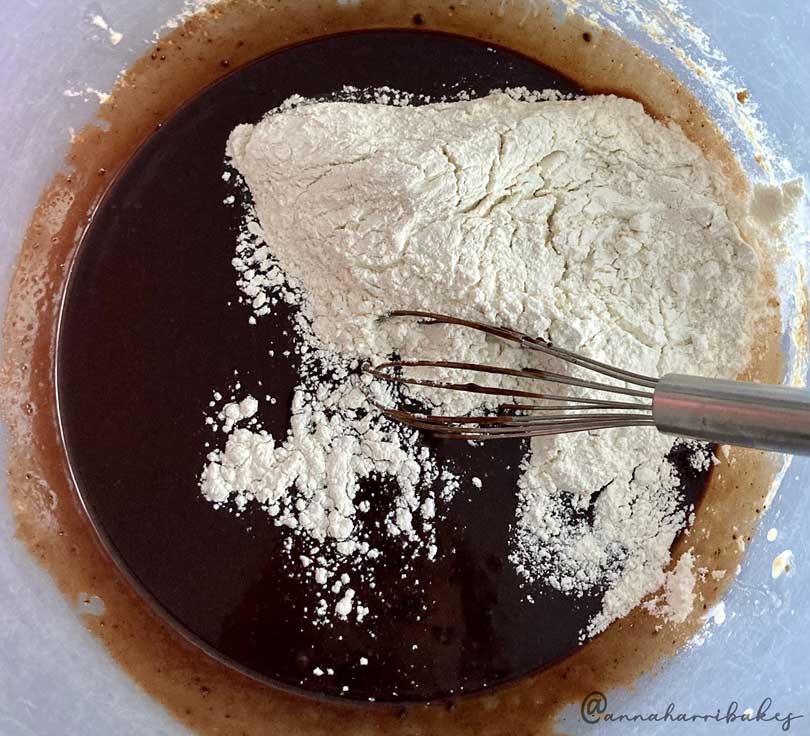
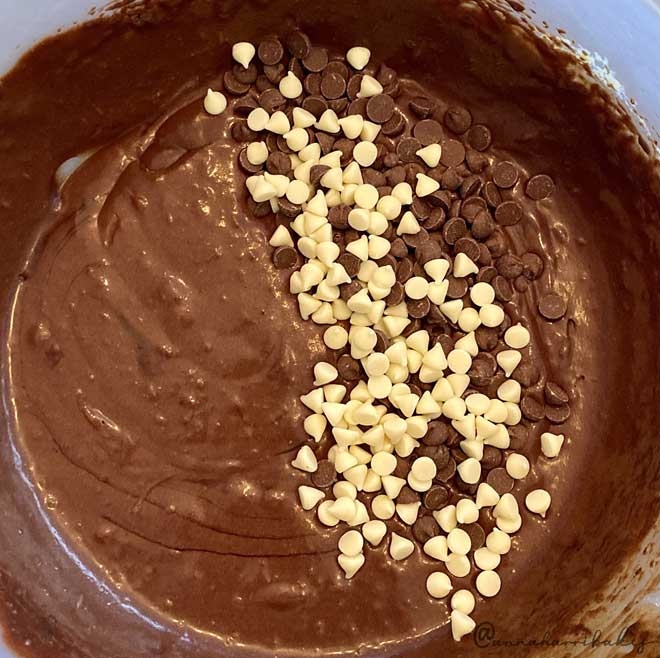
2. In another bowl, mix the eggs, yoghurt and vanilla together, and then use an electric whisk to mix this with the porter mixture, followed by the flour and bicarbonate of soda. Stir in the chocolate chips using a metal spoon.
|
|
3. Divide the mixture between the two sandwich tins and bake for about 30 minutes (until springy to the touch or until a skewer, when inserted into the middle of the cake, comes out clean). Transfer to a cooling tray and, after 10 minutes, remove the cakes from the tins and peel off the baking parchment. Leave to cool fully.
4. To make the filling, beat the butter and icing sugar together using an electric whisk. Once light and fluffy, add the vanilla extract and then whisk in the cream cheese, until it’s fully incorporated and the mixture is light and creamy.
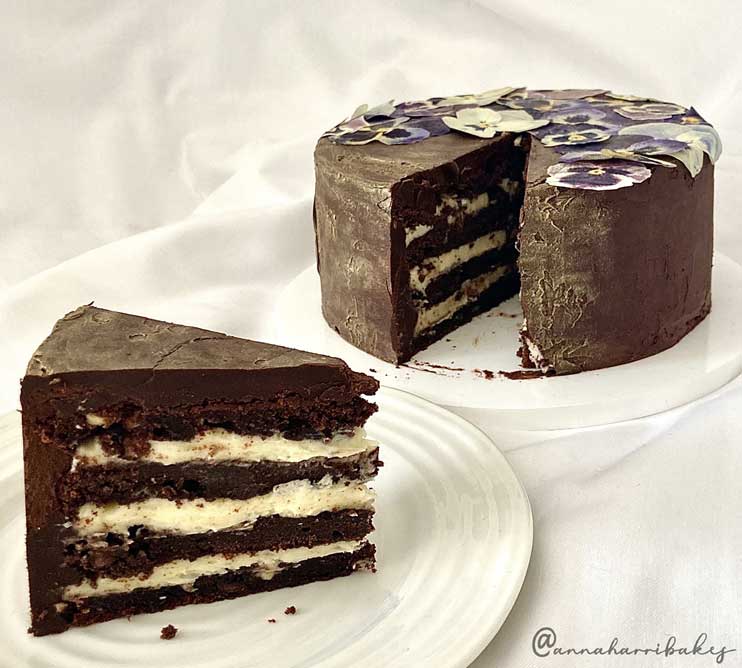
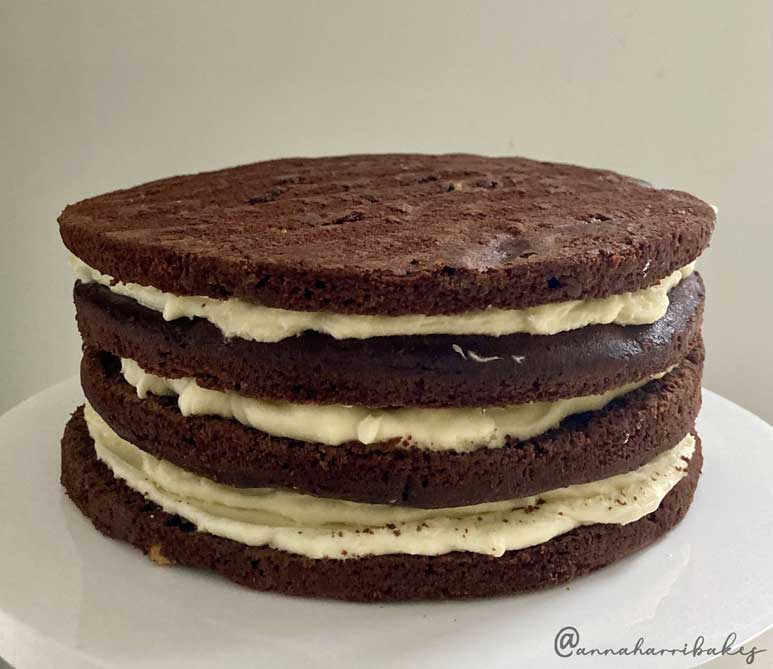
5. Split the cakes into halves horizontally, to create four layers. Use a serrated knife to do this. Put a small spoonful of the frosting in the middle of your serving plate, and place the first layer directly on top (this will stabilise the cake, providing a good foundation). Spread a thick layer of frosting over the first layer, and repeat until you’ve created a four-layered stack. Top tip: use the bottom half of one of the cakes for the top of your stacked cake, which will create a more even and stable finish. Chill in the fridge.
4. To make the filling, beat the butter and icing sugar together using an electric whisk. Once light and fluffy, add the vanilla extract and then whisk in the cream cheese, until it’s fully incorporated and the mixture is light and creamy.
5. Split the cakes into halves horizontally, to create four layers. Use a serrated knife to do this. Put a small spoonful of the frosting in the middle of your serving plate, and place the first layer directly on top (this will stabilise the cake, providing a good foundation). Spread a thick layer of frosting over the first layer, and repeat until you’ve created a four-layered stack. Top tip: use the bottom half of one of the cakes for the top of your stacked cake, which will create a more even and stable finish. Chill in the fridge.
|
|
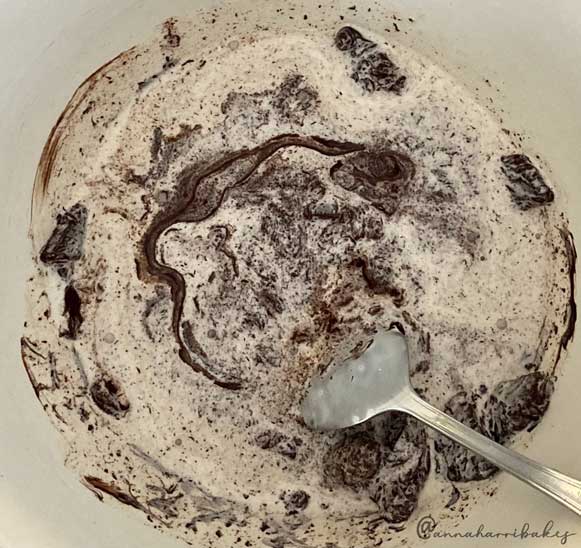
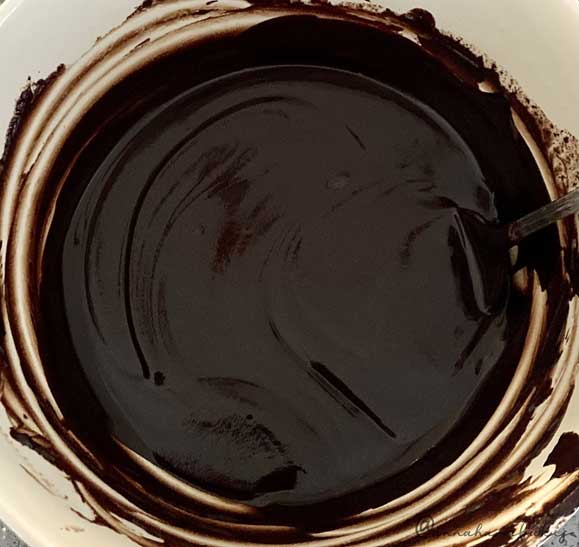
6. To make the frosting, chop the chocolate into small, evenly sized pieces (the smaller the better) and place in a large, wide-bottomed bowl. Heat the double cream in a saucepan over a low heat. As soon as it begins to simmer, take it off the heat and pour it directly over the chopped chocolate. Leave for 5 minutes and then stir the cream and chocolate together until a glossy ganache forms. Leave to cool for about 30-45 minutes until thickened (it will be too runny to use immediately). Then, remove the cake from the fridge and, using a palette knife, cover the cake in the ganache. A rustic finish looks beautiful, but if you’d like smooth edges, use a cake scraper. The ganache should set quickly, due to the temperature of the cake.
|
|
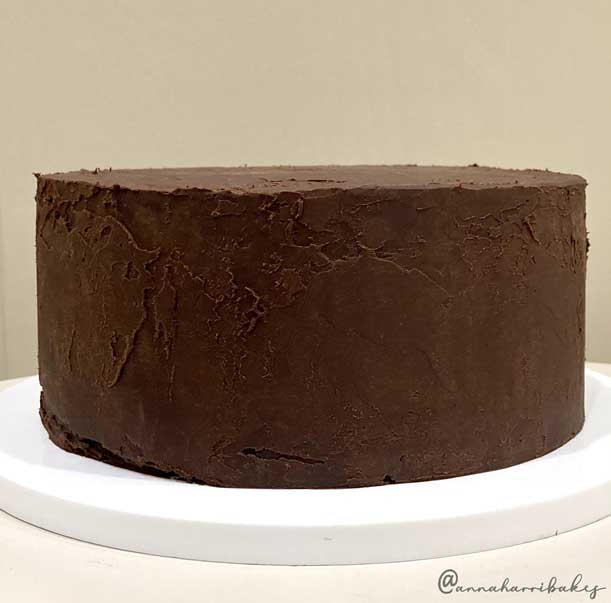
7. Once set, you can decorate it: I used a food-safe brush to apply edible gold lustre over the ganache, which emphasised its beautiful textured surface. Then, I arranged pressed pansies over the surface and sides, attaching them with dark melted chocolate. Equally, you could create a beautiful arrangement of fruit, freeze-dried strawberries, chocolates/sweets, or edible sprinkles.